I was invited to a baby shower. I hadn’t attended one in such a long while! The mother-to-be registered for a few things and I really dislikedthat there were people who went off-registry for my shower, especially since I took the time to pick and choose what I wanted my baby to have. However, since becoming a mother, I quickly realized that it’s really not about that kind of thing. I am crafty. To pick an item off the registry, to me, seemed a little too easy…and a bit boring. I wanted to gift her something practical, yet appealing. So, I wanted to make her a diaper cake. What new baby didn’t need a ton of diapers??
A friend of mine makes spectacular diapers cakes ALL the time. I mean, really. I think she makes them at least once a month…or multiple ones at the same time. They are truly beautiful when complete, such that I wouldn’t want to take them apart…even if I had no diapers left and a stinky baby. We’d adapt that burp cloth to function until I could get to the store for more! I digress. I thought about it more and decided that I really wanted something a little different, so I was going to make a square diaper cake, then a diaper bassinet, but I ultimately decided on making a sailboat because it’s a nautical themed shower. How cute, right? So, I was on the hunt for a tutorial to make exactly what I had in mind. Much to my disappointment, nothing measured up to my standards of grandeur. I saw plenty of small boats with, like, 20 diapers involved or ones you could buy for $75 or more, but I wanted to MAKE it! So, I decided to wing-it with the intention of creating my own tutorial….to share with the masses!
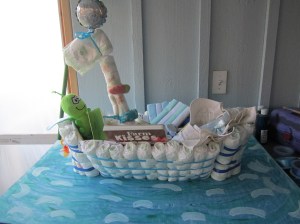
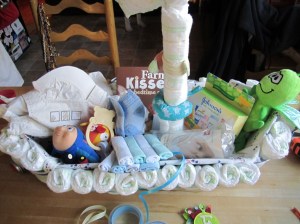
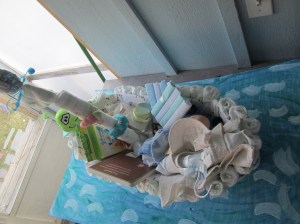
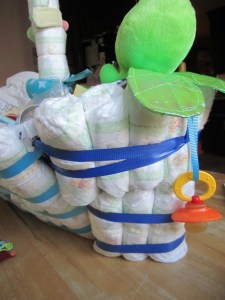
Here it is, complete with step-by-step pictures, some tips from along the way, and the final project. It came out awesome if I might blow my own foghorn and I think you’ll agree. Give it a try and LMK how your’s turned out!
Materials List:
Diapers (I used Size 1, but size 1 or 2 will work), 1/2″ wide curling ribbon, cardboard base, hot glue, dowel, fabric,clear elastics, baby accessories.
Start with:
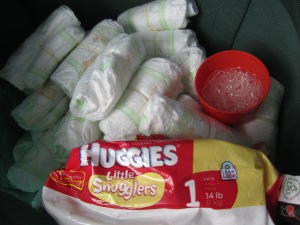
*a 17″ x 16″ piece of cardboard (I used this measurement because of the Size 1 Huggies Snugglers. Two of them stacked on top of eachother was approximately 8.5″ tall. And 10 of them laid next to eachother was ~16” long)

This is how I measured the size of the hull. Two diapers stacked on top of eachother (8.5" tall) and 10 diapers laid next to eachother (16" long).
*(2) 8.5″ x 8.25″ squares of cardboard.
*80 Size 1 diapers, (I got two pkg of 40 diapers each) rolled and secured with clear elastics (Find a pkg of them at drug stores, 250-500 per pkg for a few dollars. But, I got 1000 clear and black together at Family Dollar for $1!!!)
*36″ x 19″ piece of fabric
*~15″ skinny dowel ~1/4″ thick
*Curling ribbon & hot glue
Instructions:
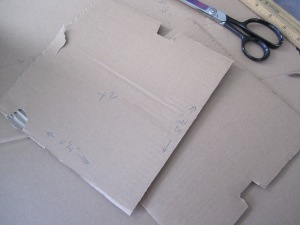
1.Fold the large piece of cardboard in half so there are two 8.5″ portions. You will have a large valley.
2. Score both of the squares on the diagonal.
3. Hot glue the square to the end of the valley at the “V”. Hold in place until dry. Repeat on other end.
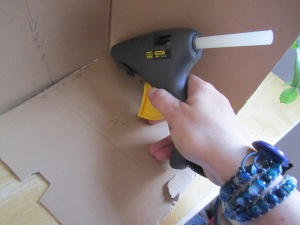
Apply a generous amount of glue to attach the ends to the hull. When you valley fold the end, you'll want those pieces securely attached.
4. Fold the square on the score and hot glue in a small valley position. hold until glue sets. Repeat on other end.
5. You should now have a rough boat shaped cardboard base.
6. Taking care not to get glue on any of the diapers will make sure they are all usable when disassembled.
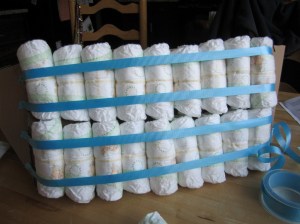
Hot glue a length of ribbon to one end of the broad side of the boat, roughly 1″ from the bottom or about 1/3 of the way up the diaper. Line up 9 diapers next to eachother and affix the other end of the ribbon to the other end of the broad side of the boat and hot glue, tightly against the diapers. Repeat with a 2nd ribbon at the 2/3 position of the diaper.
7. Repeat Step 6 for a second row of diapers on the broad side of the boat.
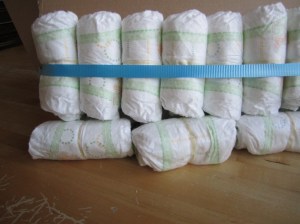
Propping up the first row of diapers with extra diapers while assembling the second row helps keep things in place until the boat sits upright.
8. Secure a small piece of ribbon around the top ribbon of each row at about the middle and hot glue it to the side of the boat, between 2 diapers. It’ll help to keep the diapers from “bowing” in the middle.
9. Repeat Steps 6-8 for the other broad side of the boat.
10. For the valley ends of the boat (front and back): Start the same way as in Step 6, but position the ribbon a little higher to account for the fold. Line up 5 diapers and fit around the fold. Secure tightly on the other side. Tip: If you affix the ribbon above the very first ribbon from the broad side of the boat and attach each subsequent ribbon above the broad side ribbon it’s easier and looks woven.
11. For the second row on the valley front, line up 7 diapers and secure tightly.
12. You may need to trim the top point of the cardboard square to line up with the top of the diapers. I needed to, and trimmed off about a 2″ high triangular piece.
13. Add a small length of ribbon around the two ribbons of the top row in the middle and secure perpendicular to the row at the tip of the boat. This helps to keep the diapers from popping out and slipping.

The bow of the boat. Secured with the perpendicular ribbon to help hold the diapers in place securely.
14. Repeat steps 10-13 for the other valley end of the boat.
15. Tuck in 1 extra diaper in each row of the broad sides of the boat. You should end up with 10 diapers in each row, for a total of 40 diapers.
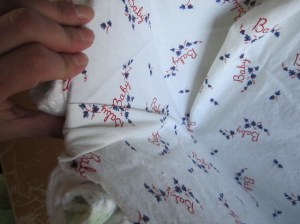
16. Dry fit your fabric piece to trim around the approximate shape of the boat. The ends will have excess to be trimmed. It’s not necessary for perfect edges, they are going to be tucked behind the top rows of diapers all around the boat.
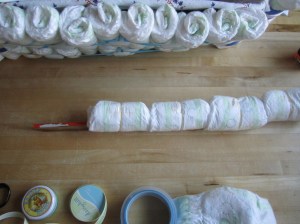
18. Put the dowel thru the center of 3-4 diapers to cover its length. Tie an open diaper around the top of the dowel as a flag. This is your “mast.”
19. Put the excess rolled diapers (I had 11 left) into the bottom of the boat to help hold up the “Mast”.
20> Fill with baby accessories.
Tips: I used a binky as an anchor. Outlet covers hot glued lightly to the ribbons function as portholes, and folded the washcloths into ducks and the little socks into a bouquet of roses.




May 22, 2012 @ 17:25:45
Thats the first diaper cake sail boat I’ve ever seen. Amazing!